Planning rides and loading the GPX
Plan my rides takes the stops you still need and splits them into rides that fit your day. Open each ride in your map app, or download a GPX file for your bike. Stops that are approved or waiting for review are left out.
- Tap Rides in the bottom bar. On Home you can also tap Plan my rides. It plans the challenge you opened last. You don’t need to have joined it. A challenge you haven’t joined shows Plan my rides right beside Join this challenge, and every national challenge has its own Plan my rides button.
- Under Split into, tap + or − (they read as More rides and Fewer rides) to choose how many rides. The line under it, like Suggested: 3 rides, is how many fit your day. If you’re on a different number, tap Use 3 to switch.
- Under Start from, tap Dealer, My location, or An address. See below.
- Leave Loop back to start ticked to finish where you began. Untick it for one-way rides.
- Under Miles I’m up for in a day, tap 300, 400, 500, or 600. For any other number, type it in the Other box (300 to 1,500).
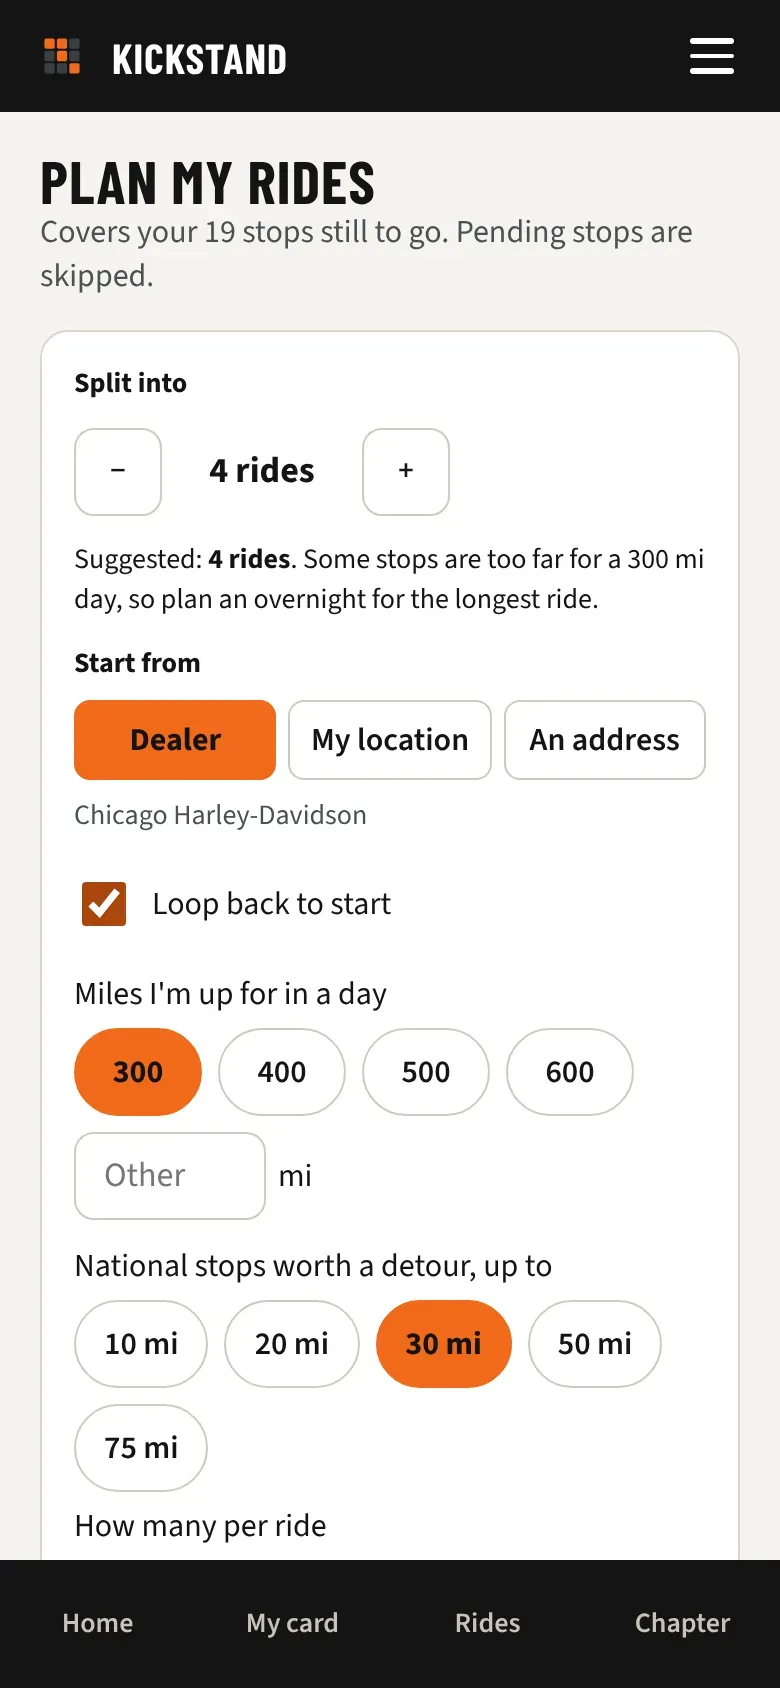
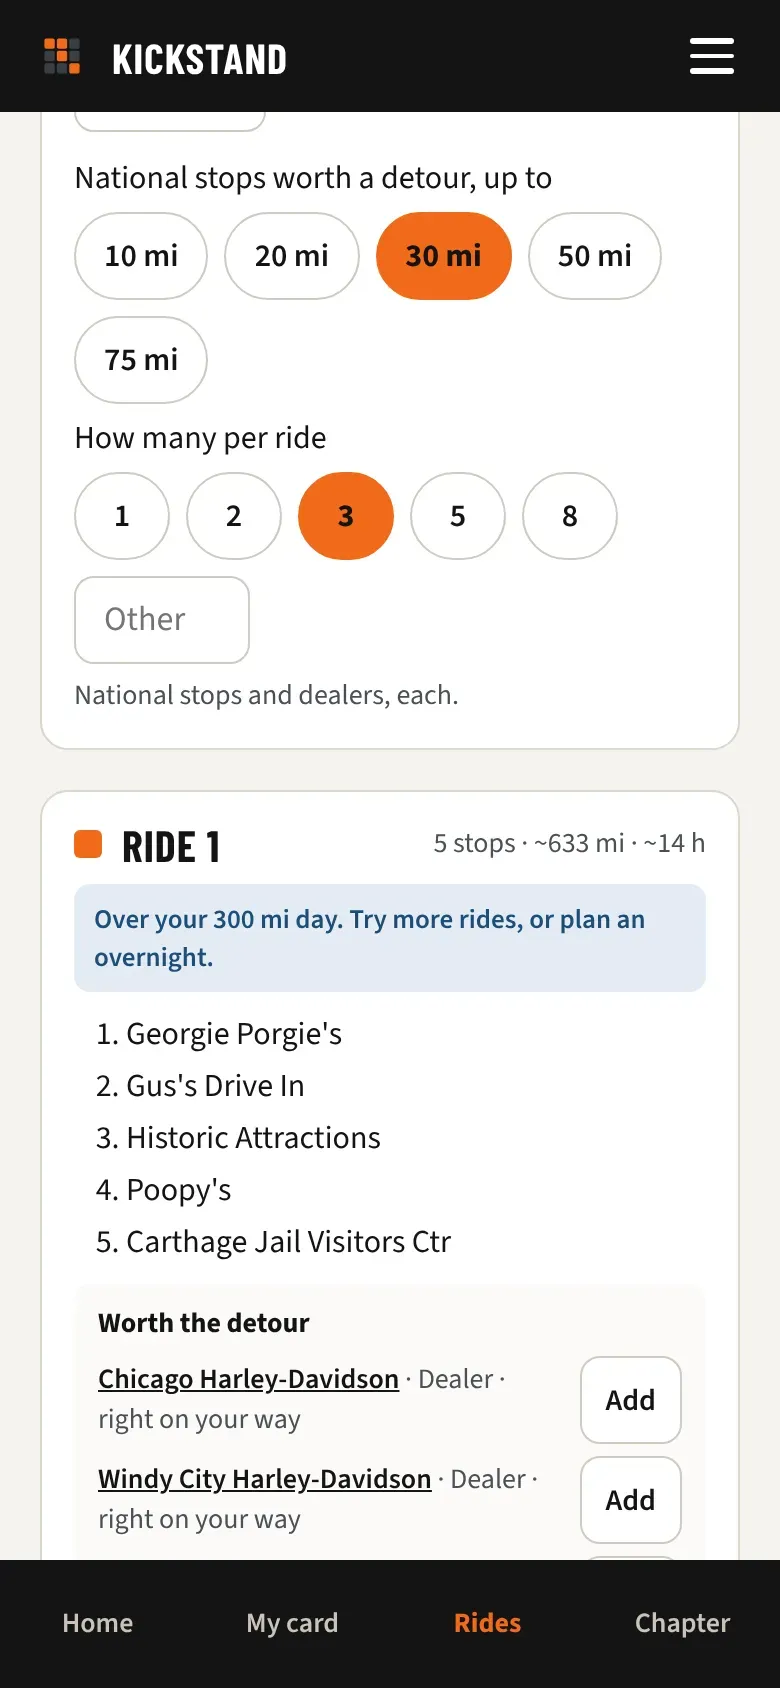
- The rides redraw by themselves every time you change something. Each ride lists its stops in order with rough miles and hours, like “6 stops · ~212 mi · ~5 h”. Tap a stop name to open that stop.
- On the ride you want, tap the button for your map app (next section).
Start from
Section titled “Start from”- Dealer is your chapter’s sponsoring dealer. Its name shows under the buttons.
- My location starts from where you are now. Your phone may ask to share your location. If it can’t find you, the app says so and you can switch back to Dealer.
- An address shows a box. Type an address or place, tap Search, then tap a result. If address search isn’t available yet, the app says so. Use My location instead.
Your start point is for this plan only. Next time you open the planner it starts from Dealer again.
Open a ride in your map app
Section titled “Open a ride in your map app”The first time, the planner asks Which map app do you use? Pick Google Maps, Apple Maps, Waze, or H-D app. You can change it later in your profile under Riding preferences, in Map app I use.
- Google Maps: tap Open in Google Maps. A long ride opens in legs of 9 stops per link, so the note under the ride shows Leg 1, Leg 2, and so on. Shorter rides open as one route.
- Apple Maps: tap Open in Apple Maps for the first hop. Apple Maps takes one stop at a time, so open Apple Maps, one stop at a time for a link to each hop after that. On a loop the last one is Back to start.
- Waze: Waze takes one stop at a time. Under the ride you get a link for each stop, like “To Stop Name in Waze”. Tap the next one when you’re ready to ride to it. Whole ride in Google Maps is there too.
- H-D app: GPX file for the H-D app comes first, with Or open in Google Maps or Apple Maps below it.
Every ride also has a GPX file button and a link to open it in another map app.
Loading the GPX on your bike
Section titled “Loading the GPX on your bike”Tap GPX file (or GPX file for the H-D app) on the ride you want. Your phone downloads a file for that one ride. Load it into the H-D App or Ride Planner, or copy it to a USB drive for the Boom! Box. Set Alternate Routes to OFF so the route follows the plan.
Good to know
Section titled “Good to know”- Planning a ride never joins you to a challenge. If you haven’t joined, the rides cover every stop in it, since none are done yet.
- If a ride runs past your daily miles, a note says “Over your 300 mi day. Try more rides, or plan an overnight.” Your number shows in place of 300.
- If every stop is approved or waiting for review, you see “Nothing left to plan.”
- Under a ride you may see Worth the detour, with national stops and dealers close to that ride. See National challenges and Dealer Visits.
- Your daily miles, map app, and detour choices follow you to any phone or computer.
- The note at the bottom of the page says whether miles are road distances or estimates.
- For directions to a single stop, see Get directions to a stop.